Entra External ID: Custom Claims and the Portal of Lies
So, Microsoft is slowly sunsetting Azure AD B2C (thank god, no more XML policies, right?). The replacement is Entra External ID (or CIAM). The pitch is great: “It’s just standard Entra ID under the hood!”
That sounds fantastic until you try to do the one thing everyone actually uses these platforms for: collecting a custom field during sign-up and shoving it into the token.
I recently spent way too long trying to get a simple custom attribute (MemberId) to show up in a JWT. Here is the breakdown of how to do it, and more importantly, how to actually get the data out without losing your mind.
The New World (Briefly)
If you are coming from B2C, forget the Identity Experience Framework. CIAM uses User Flows (the easy GUI ones) for almost everything.
If you need custom logic (like validating a Member ID or generating one), you don’t call a REST API from an XML policy anymore. You use Custom Authentication Extensions. These trigger Azure Functions at specific events, like OnAttributeCollectionSubmit.
It’s cleaner, honestly. I wired up a Function to validate my MemberId and it worked immediately. The data was saved to the user profile.
The Problem: The Case of the Missing Claim
I had the MemberId in the directory. I verified it via Graph Explorer. It was there, staring me in the face with its ugly extension name:
But when I logged in? My ID Token looked like this:
{
  "aud": "efe03d75...",
  "iss": "https://...",
  "email": "steve@example.com",
  "name": "Steve"
}
No Member ID. Nothing. Just standard claims.
Trap #1: The Null Value
First technical “gotcha” of CIAM: If a custom attribute is null, it is dropped.
It doesn’t send a null value. It doesn’t send an empty string. The claim just ceases to exist. So if your Azure Function fails to write the data, or you mess up the casing on the attribute name (it’s case-sensitive, by the way), you will be debugging a phantom.
Always check Graph Explorer first. If the data isn’t on the user object, stop debugging the token. Fix the save.
Trap #2: The Red Herring (App Registration)
If you Google this, you will find documentation telling you to manually edit the optionalClaims in the App Registration Manifest. Don’t. That is a rabbit hole of case-sensitivity issues and source: null errors.
You only need to do two things in your App Registration:
- Permissions: Ensure your app has
User.Readpermission on Microsoft Graph and—crucially—Grant Admin Consent. - Manifest: Toggle one specific flag to allow the token issuer to accept custom maps.
"acceptMappedClaims": true
That’s it. Close the App Registration. You are done there.
The Real Fix: Enterprise Applications
The actual working UI for mapping and renaming claims in CIAM is hidden in the Enterprise Application blade (the service principal instance), not the App Registration definition.
Go to Enterprise Applications -> Find your app.
Click Single sign-on (even if you are using OIDC/OAuth, this is where the UI lives).
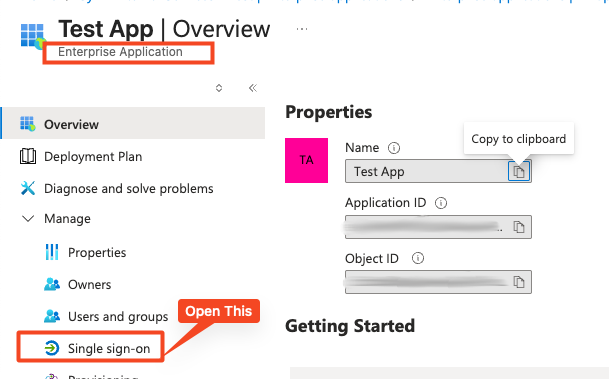
Click Edit on the Attributes & Claims box.

This is the only place that actually lets you see the hidden b2c-extensions-app schema without using PowerShell.
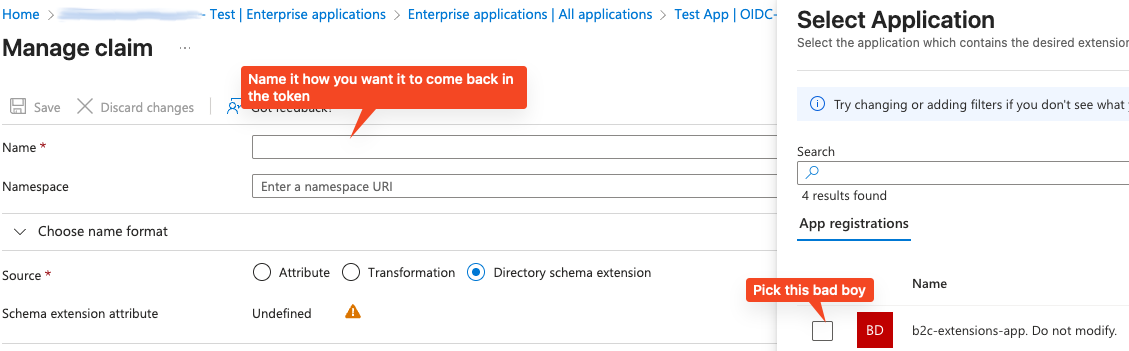
When you add a new claim, change the Source to Directory schema extension. You will be able to select the backend extension app that holds your custom data.
Select your attribute from the list.
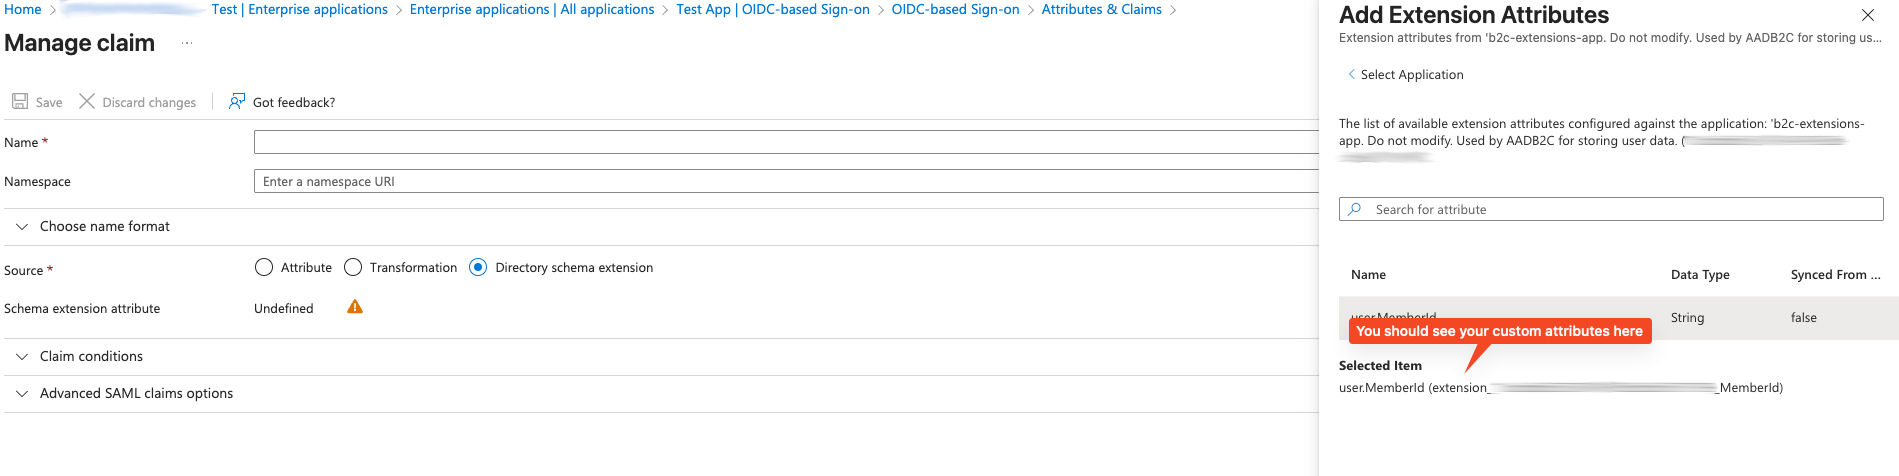
Finally, give it the clean name you actually want in your code (e.g., memberId instead of extension_<your-app-guid-here>_MemberId).
The Result
Once I saved that mapping in the Enterprise App, the token finally respected the data.

{
  "email": "steve@example.com",
  "memberId": "ASD123"
}
It works, but man, they really make you dig for it.